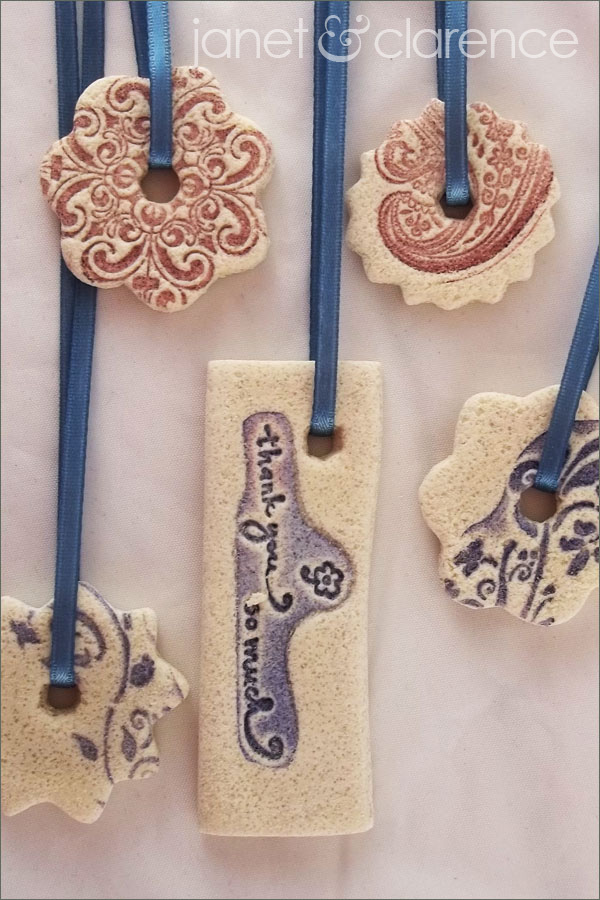

Salt dough gift tag ornaments are a great way to start a meaningful tradition. With this tutorial you can learn how to create your own tags and add your own special touch. They are so easy to make and attaching them to gifts is a very thoughtful way to show how much you really care!
Here we go!
Ingredients:
2 cups flour
1 cup salt
1 cup water
Other Tools:
Board and rolling-pin
Mini cutters
Rubber stamp(s)
Colored ink
Pencil (to create hole)
Cookie sheet to dry
Sandpaper
Ribbon
Mix the flour and salt in a large bowl and slowly add in the water. Mix the ingredients until it forms a doughy consistency. Knead the dough with your hands until the dough is smooth. Dust the cutting board and rolling-pin with flour and roll out the dough until it is about a quarter of an inch thick.
Ink your rubber stamp with ink and lightly stamp the dough while it is rolled flat. Take your mini cutter and cut the shapes out of the dough. Use the stamp designs to create interesting patterns on the gift tags.
Place the cut-outs on a cookie sheet to dry. Take a pencil or other utensil to punch a hole for the ribbon. The cut-out gift tags can either be air-dried or you can bake them in an oven on 200 degrees F for 2 – 3 hours. Once the tags are dry, take a light grit sandpaper to smooth any rough edges.
The finishing touch is a ribbon tied through the hole to hang the ornament for viewing!
That’s it! This is a super easy craft project that adds such a nice touch of thoughtfulness to any gift. I have gotten such positive feedback from my customers when I gave these out with each order. I love adding that personal touch!
P.S. The wonderful inspiration of this salt dough gift tag ornaments project was a blog post I found on Pinterest. DIY Wedding Favors: Salt Dough Tags gives a nice walk through if you’d like more details.


