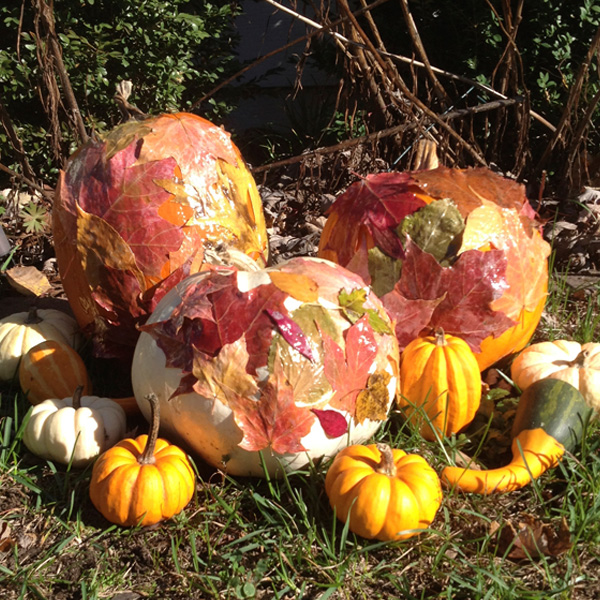

I don’t know about you, but seeing autumn leaves at the peak of their vibrant colors on a bright sunny day is just one of those situations that really make me stop and sense the passing of time. The beauty of today will quickly fade and the chill of winter will soon be upon us. I always wish to hold on to the moment a bit longer.
This is a perfect project to display the colors of the season in a festive way. It is so easy to do and impossible to mess up. This is also a nice kid-friendly project as all the materials are easy to clean up and natural. My nine-year old daughter helped me put this collection together and we had a great time doing it.
Let’s get started!
What you need for this Fall Pumpkin Mod Podge Idea:
- Colorful fall leaves, pressed (explanation to follow)
- Pumpkins, we used both orange and white but you can use whatever types you’d like.
- Mod Podge (You can choose shiny or matte, we used shiny)
- 1 inch paint brush
- Newspaper to cover the work space
- Toothpicks to secure the leaves
- Scissors to trim stems
Part 1: Fall leaf collection:
When the colors are at their peak, go outside and collect a variety of colors and types of leaves, making sure the leaves are fresh enough that they are not curling on the edges. Also, make sure you to collect enough leaves! Some things to consider:
- The number of pumpkins you plan to cover.
- The size of the pumpkins.
- Whether you are covering the front only or the entire pumpkin.
We just covered the front, and our pumpkins are 8 – 10 inches in size. We used about 10 leaves per pumpkin. We did use more than we expected!
Once the leaves are collected, place the leaves on newsprint and press them with a heavy object to flatten them out. We pressed ours for a week, but next time I think I will not wait so long as the leaves were stiffer than I’d like and forming them to the pumpkins was more challenging than expected. I believe if they were a bit fresher, it would have been easier. (If you try it sooner, let me know your results!)
Part 2: Mod Podge Time!
Lay the newspaper on the surface you will be working, as it may get a bit messy with the amount of Mod Podge needed. Next, just spread Mod Podge on both the surface of the pumpkin and the back of the leaves. The glue will look white and cloudy, but it will dry clear. The glue takes a while to dry, so do not be afraid to move the leaves around to get the perfect collage. If a leaf does not want to stay in place, simply tack a toothpick into the edges of the leaf to secure. Be sure to mix the colors and style of leaves. Change direction and create a colorful fall leaf display!
Next, let the leaves dry, checking on them periodically to make sure they did not slide down or curl up on the edges. Add tooth picks to secure curling areas. Adding additional coats may be helpful for the stubborn areas. Just make sure to remove your toothpicks before the glue becomes too dry or the glue will pull up on removal. Next, trim any stems that are sticking out or too long.
Once it is dry, it is finished! Simply arrange the pumpkins inside or outside for a festive and colorful display. What a great way to preserve the colors of the season!
If you try this Fall Pumpkin Mod Podge Idea, let us know in the comments below!
Thanks for reading!
-Tracy


